Showing posts with label Nails. Show all posts

Wednesday, 3 September 2014

BarryM Gelly Hi-Shine Nail Paint - Blueberry 5

 
Sometimes you just want to try something before committing yourself to buy it which is why Summer from Beauty on a Budget and I did a little nail polish swap! (Guys she could probably open a salon/shop will all the different nail polishes she's got!....which is heaven for me)
Anyway therefore I am trying a couple of polishes and this is one of them!

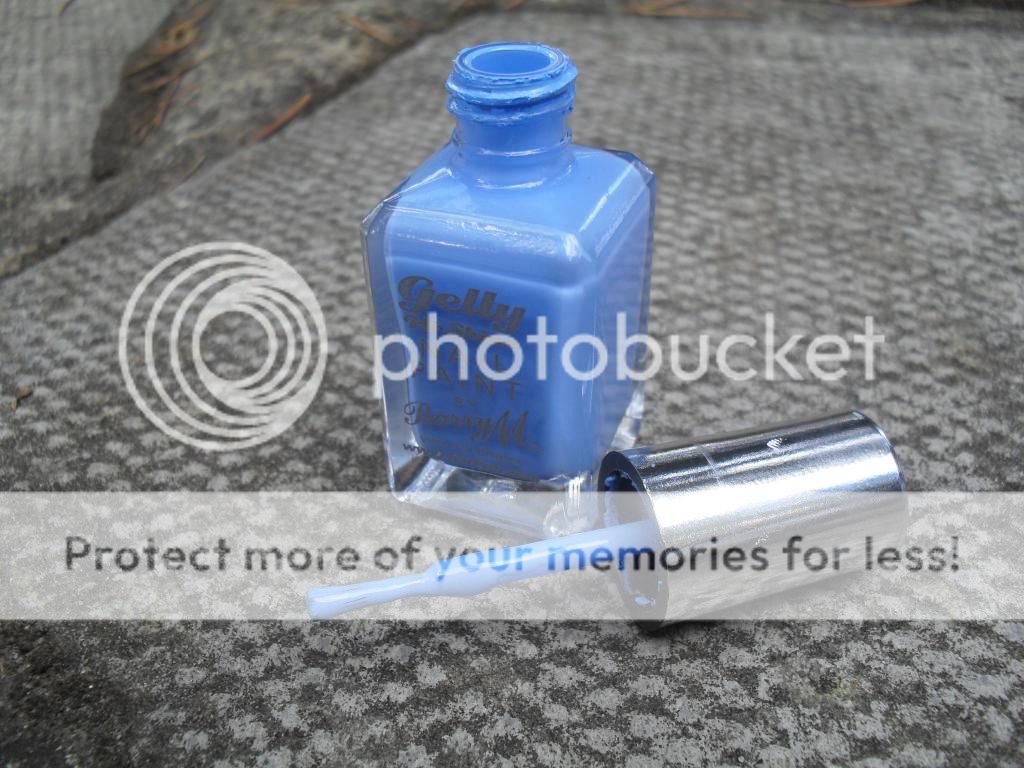
 
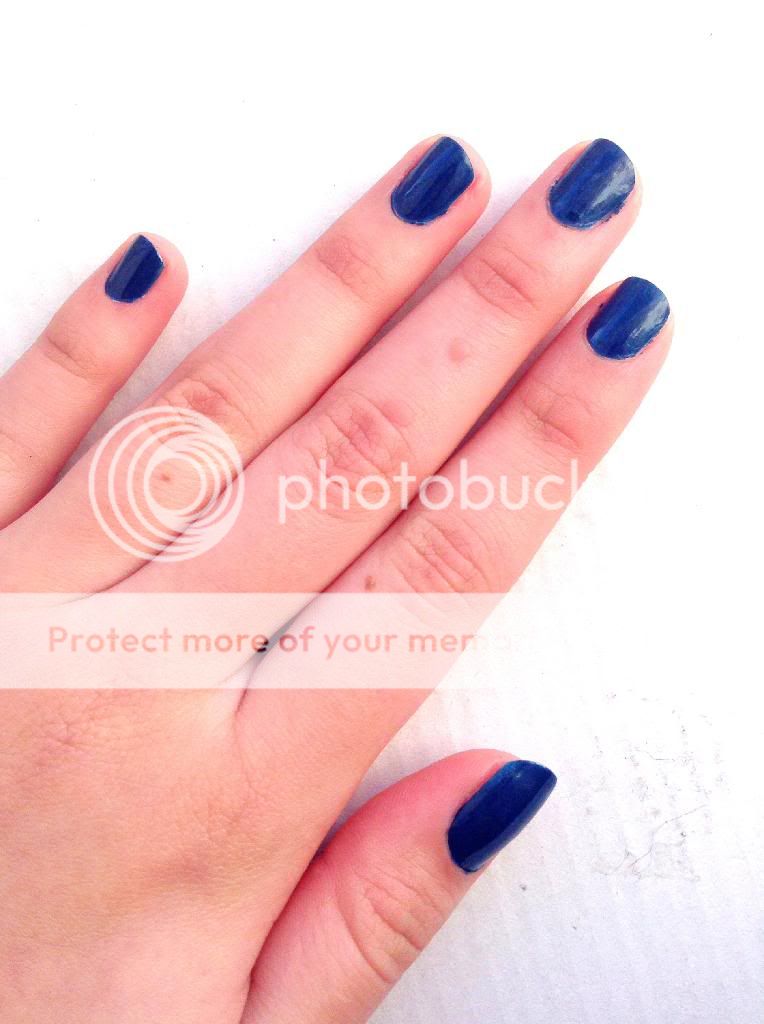
This BarryM Gelly Hi-Shine Polish in the shade 05 - Blueberry is just one of the loveliest cloudy bluey shade. I don't know why but it reminds me of a cloudy blue sky and a calm-like afternoon (hence my description of the shade.)

This is a very universal shade in my opinion and it does dry reasonably quickly and the best of all is it  will only require 2 coats for full colour payoff, which is brilliant if you have an event to go to, and you happen to be doing your nails last minute!
 
Rings From H&M - £1.99

The thing I like the most from this shade is that I think it's the perfect understated hint of colour. If you want to add colour to your nails that won't be in your face or look sickly pale or be too dark. Its honestly the perfect shade! I find that this also is very complimentary to many outfits, so you wont feel as if your clashing!

I absolutely plan on buying this next time I go Nail Polish hunting!

You can get this from:
Superdrug: Blueberry - £3.99

L.F.A. Xx
*Borrowed from Summer's Beauty on a Budget! Xx*

Tuesday, 26 August 2014

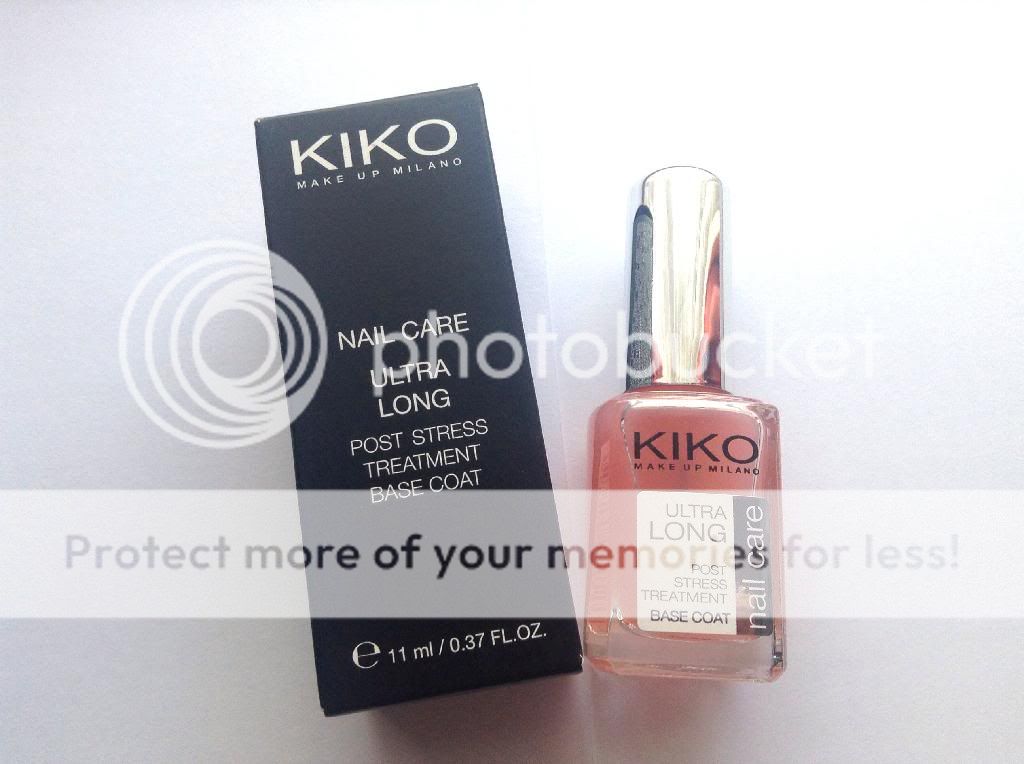
KIKO Ultra Long Nail Post Stress Treatment Base Coat


This is lovely gem is from KIKO's  Nail Care Section and at the time I had very short sad looking nails, so I thought it'd be perfect to try it out as I had never tried any of their Nail Care Products before, and was quite frankly fed up with having short nails.

You can see that the colour is a nice clear natural pink which is nice as on it's own it gives my nail a very healthy looking glow and natural shine. You could get away with wearing this to work on its own and your nails looking nice!
This also dries remarkably quickly and since it has a fat brush it is easy to apply and quickly covers the whole nail in one go. (I'm usually not a fan of fat brushes but I didn't find it that annoying! Maybe I'm getting used to them?)

According to the description given by KIKO on their website, this nail treatment comes with:
"Vitamin E - An Antioxidant and Moisturizer,
Vitamin A - Helps form Keratin (Protein that makes up the structure of the nail)
Vitamin C - Fights free radicals and helps maintain youthful looking nails. "
 
Which are all fantastic things to hear about a nail polish, and to even convince you further to try these is that this polish is a 5-Free Nail Polish which, means it does not include ingredients like:
Camphor,
DBP (Dibutyl Phthalate)
Formaldehyde Resin,"
Which are all considered to be not particularly good for you in their own respective ways. Especially if your using a treatment nail polish which is meant to benefit you not the opposite. For some I have added links so that you may quickly read more about it or you can Google it too!
This information of course made me even more eager to try this to see if it worked because it seemed like it would be perfect!
 

Now as a Base Coat itself I didn't find that it prolonged the duration of my nail polish. In fact I found that my nail polishes lasted about the same as if I hadn't used one, but it does serve its purpose of protecting the nail from getting stained too.

As a Nail Treatment I believe IT DOES WORK 100% as my nails are significantly longer than when they first started, and the look better, haven't become brittle or prone to shedding and are honestly much stronger. But I would say is this treatment isn't one that is absorbed like the Mavala Nail Strengthen (which I've used in the past) where you would see it is be absorbed by the nail. This sits on top of the nail as a base coat would but it does work! And of course it does take some time, because obviously your nail does need time to grow too!

Personally I loved this and will be 100% repurchasing this and adding it to my staple favourites.
 What about you? Have you tried it? Or will you?

You can get this In-store or Online for:
£3.50 (SALE) - £4.90 (RRP)

 
L.F.A. Xx

Thursday, 31 July 2014

World Cup Nails - Team Germany (The Winners)


First of all I must say congratulations to Team Germany on their success in winning the World Cup especially as they're the first European country to win a World Cup in Las Americas!!
As I have watched almost every game it was much deserved, even though I was rooting for any South American country....(apart from Brazil since they took out Colombia!) So of course I was ecstatic they beat they were beat by 7.1 !!!

Anyway enough of the footie and on to the beauty. I decided even though it is over to at least award them with their own set of nail art!
 
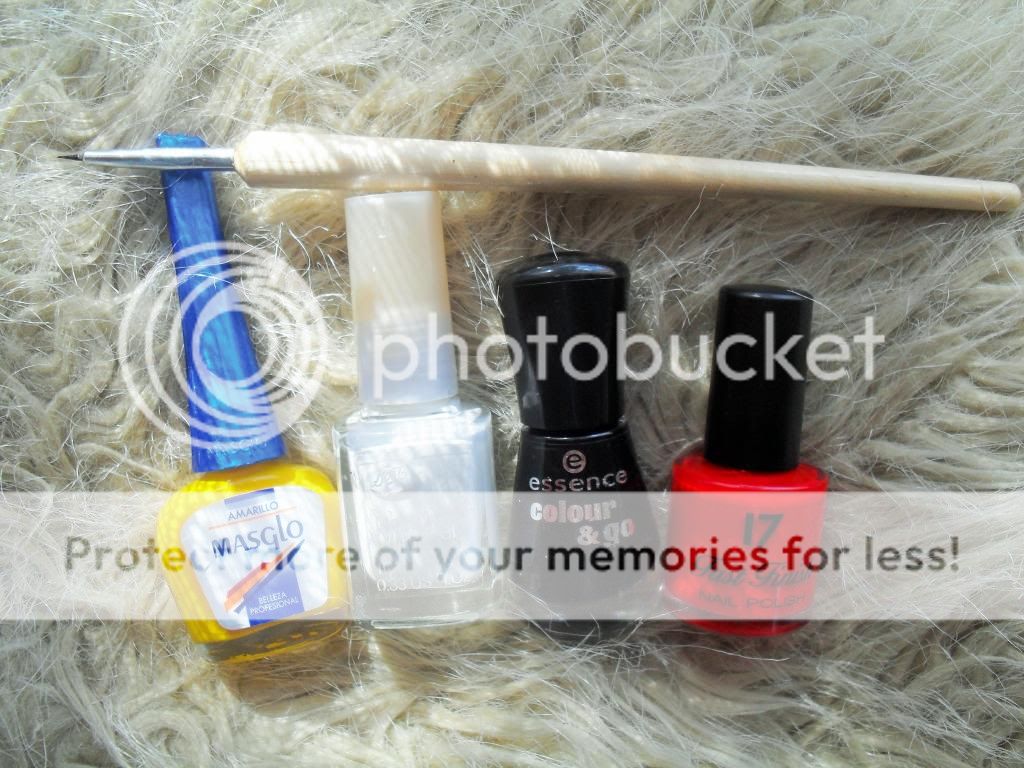
So for these nail polishes I used for this design: Masglo - Amarillo, White - Boots, Essence - Back to Black, SEVENTEEN - Knockout Red and of course my nail art brushes!

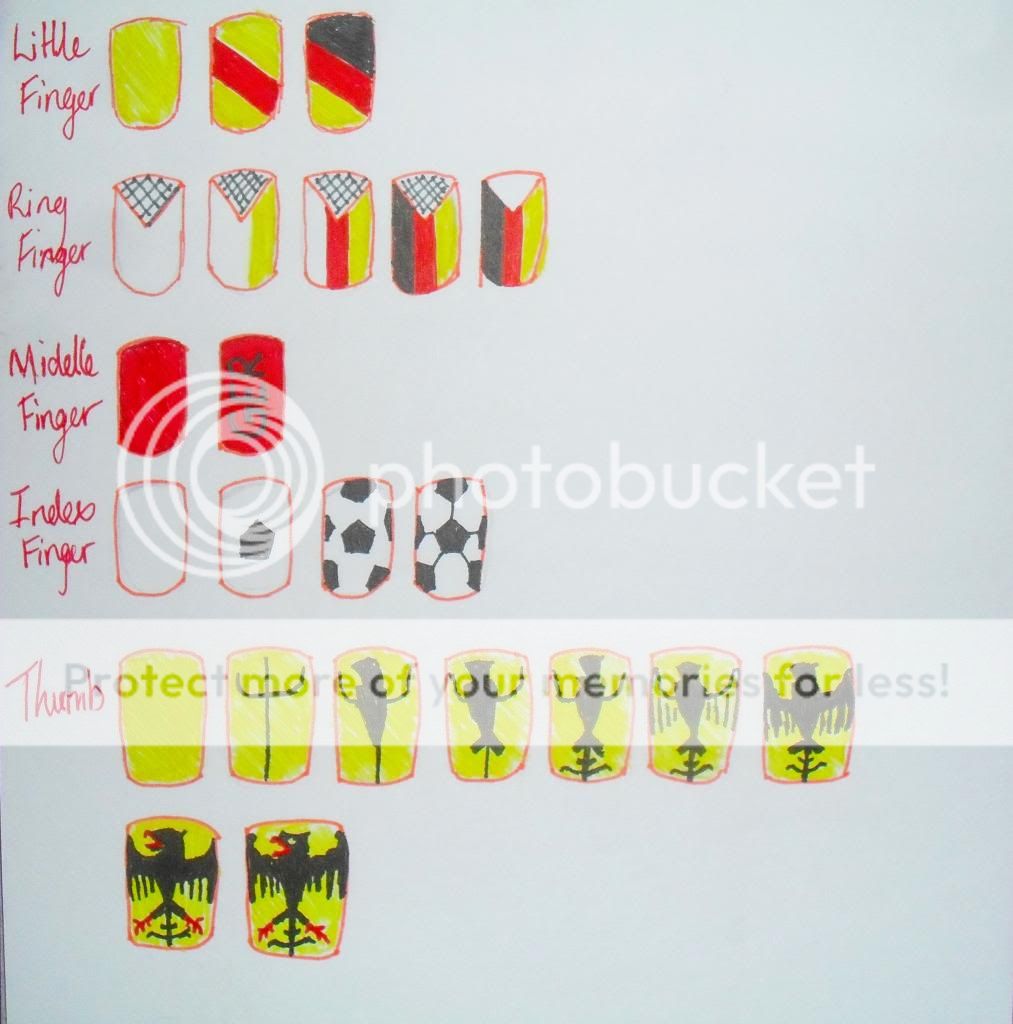
So once you have your polishes ready, follow these instructions:
 
Here are a little tips and tricks to help you perfect this design:
Have PATIENCE and make sure your in the right mood (aka CALM mood) so you can try these!
Make sure the base colours are completely dry before drawing any art on top.

RING FINGER
  • Masking Tape I would suggest adding a corner of a piece of masking tape, draw the lines then remove masking tape and fill in white.
OR
  •  Paint the entire nail white, draw an upside down triangle in a light colour. Then draw the stripes up to the triangle.

INDEX FINGER - (click --> here <-- for details to help you achieve this.

THUMB
  1. Paint Base Coat. (Please wait till 100% dry!!) 
  2. Draw a cross with raised up arms down the middle of your nail.
  3. Then from a little above where the lines cross draw an upside down triangle  and a filled in semi-circle so it can look like a bird. 
  4. From the bottom of the triangle draw two lines (arrow pointing upwards shape)
  5. Draw two semi-circles, but add a small downward flick at the end of the bottom one.
  6. Then draw 4 lines coming down from the arms to create the wings (make them smaller as they go in)
  7. Fill in the wings and try and make the top part thicker.
  8. With a Red add the claws to the arrow pointing upwards shape and the beak. Make sure the top beak has a downward flick.
  9. Add the finishing touches with a white to make the eye, and with the black flatten the head with a flick at the end and add 3 muscle like shapes to the top of the wings!

So let me know what you think guys! Would you like to see other countries even though it's no longer the World Cup?
If you try these or have you own tag me on Twitter or Instagram @lovefromangelic so I can see!!

L.F.A. Xx

Tuesday, 1 July 2014

World Cup Nails - Argentina


If your are keeping up with the World Cup we now know all the groups that have qualified for the next round and Argentina is one of them, going to the quarter finals!!!
So if you want to support this Team why not give yourself this Team Argentina mani!
 

Now I will admit all of the nails are relatively simple but the Thumb. So if you want to have a crack at all of them kudos to you if not you can always repeat and change it up a little!
The polishes I used were, Masglo - Amarillo, Essence - Once Upon a Time... and Black is Back, Nails Inc. - Queen Victoria Street, BarryM Gelly Hi-Shine - Blueberry, and Boots - White.
Initially I wasn't entirely convinced that Blueberry was the exact shade if blue for the Argentinian flag however after much deliberation I think this is as close as I could possibly get so don't kill me if it's bit off!!!

So to recreate these nails follow these instruction:


Of course here are some tips and tricks for you to be able to achieve this easier!
  • These took me a good 20-30mins to create because of the thumb, so I suggest you be PATIENT and are in a  calm or creative mood!
  • For clearer tips on how to create the index read the 4th Bullet point --> here<--
  • Make sure you base colours are completely dry before attempting any  

THUMB 
  1. First of all try and draw a circle onto the nail as a guide for the entire shape. 
  2. Then draw 4 long triangles pointing outwards. (Horizontal and Vertical)
  3. Draw another 4 Triangles pointing outwards. (In between each horizontal and vertices triangle)
  4. On either side of each point draw a squiggle (almost like a stretched out/elongated "S") Try and make it that all are facing the same way but if you can't that's fine. 
  5. Now with a darker colour preferably a brown/bronze draw a thin outline for each sun ray. (I only had a metallic bronze and to be honest I think it makes it looks much better since the sun is meant to be bright and shinning) TIP - it may be easier to start the line from the point down back to the centre.
  6. Now with the same colour outline the circle to define the centre/face of the sun.
  7. OPTIONAL - Finally only if you really feel up to the task and confident you can attempt to draw in some eyes, nose and mouth. (Because in the Argentinian flag the sun has a face)
  • TIP - try and make your brush as flat as possible by taking off any excess and leaving the lowest amount of product possible, and when re-dipping try to only get nail polish onto the tip of the brush.

So guys let me know what other countries you want to see and if you try these please tag me @lovefromangelic on Twitter or Instagram as would love to see how your supporting your country and of course Team Argentina!


L.F.A. Xx

Tuesday, 24 June 2014

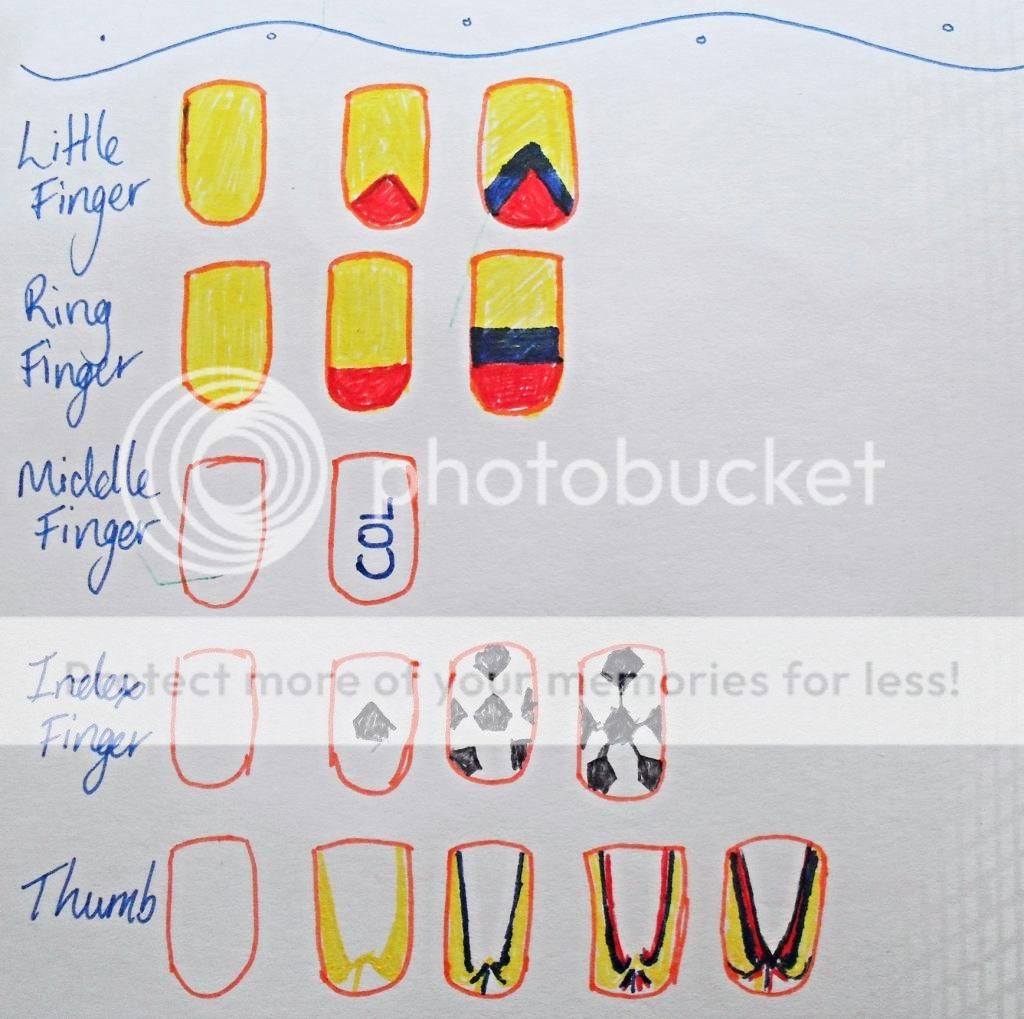
World Cup Nails - Team Colombia


As a Colombian (that's in South America in case any of you don't know where it it. No I'm not demeaning your intellect but I've been asked way to many tomes where it is.) I'm incredibly proud by how far we've gotten especially as Radamel Falcao our key star player was left out of the World Cup! Bit thankfully we pulled through and have presented some amazing goals!


Anyway as an homage to my glorious birth country I have designed these nails in case any of you are Team Colombia!! These are relatively easy so any of you guys could try these too!
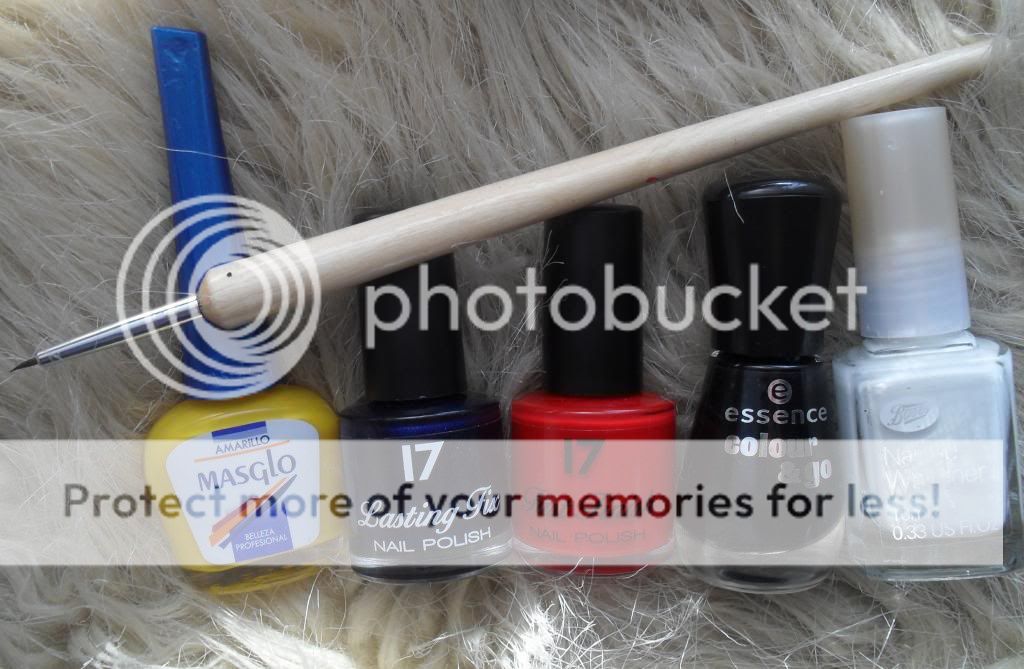
The nail polishes I used were the Masglo - Amarillo (from Colombia!), 17 (SEVENTEEN) - Midnight Sapphire and Knockout Red, Essence Black is Back and Boots White, and y nail brush from eBay.


So again like last time here are some tips and tricks so that your can achieve the same look!
  • This nail design took me about 10-15 minutes so not particularly long but you will need to have PATIENCE and be CALM.
  • Make sure each coat is completely dry so that no bleeding or changing colour occurs.
  • MIDDLE FINGER- I shortened Colombia to COL as my nail isn't long enough!
  • INÐEX FINGER - (Bullet Point 4 for extra detail.) 
  • THUMB - If you look up "Colombia Coat of Arms" for a clearer view of what your drawing but your basically drawing to wings with the Colombian flag with the yellow outwards. And then finish off with a thin black line on the inside and on the put of the yellow.

I hope you guys try this nail design! Remember send me or tag me on Instagram or Twitter @lovefromangelic with your Team Colombia Nail Designs or any other team as I love nail art!

L.F.A. Xx

Friday, 20 June 2014

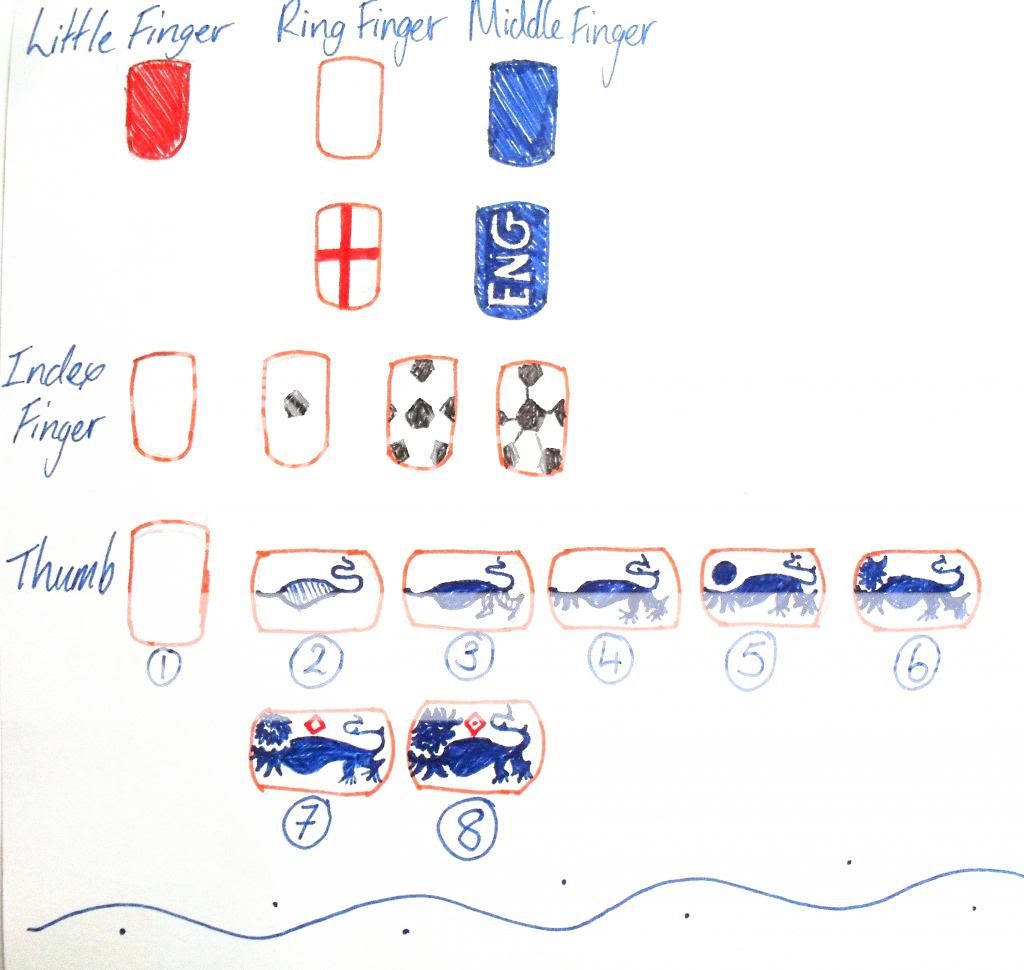
World Cup Nails - Team England

To say I'm devastated that England didn't make it through is an understatement, but there is still one game left and hopefully England will go out with a Bang! And you can try and sport these nails for the match.

These are relatively easy apart from the Index Finger and the Thumb. The thumb in particular sports on the iconic Lions on the England shirt but is incredibly difficult to do and requires a lot of patience and adjustment depending on the size of your nail.
Again like the last nail design I drew the instructional plans afterwards as its trial and error when I do it as I'm not always sure whether I'll be happy with the end result.

The colours I used for these designs were the: MaxFactor Glossfinity - Colbat Blue, 17 (SEVENTEEN) - Midnight Sapphire and Knockout Red, Essence- Black is Back, and Boots - White. And the nail brush is from my eBay haul but the paint rubbed off. However I will explain all that in a different post.

So now to create these nails follow these instructions:
As you can see the lion has changed many shapes numerous times hehehe sorry I can't always make it identical!

 Here are a couple of tips to help you, and I will do numerical instructions for the thumb so that you may fully get the help you need!
  • Make sure you are CALM and have PATIENCE as this should take you about 25-30 minutes to do this (of course it can be quicker or slower depending on you)
  • INDEX FINGER (See 3rd Bullet Point -->here<--)
Now for the Thumb:
  1. Paint your white base coat and make sure it completely dries.
  2. With either your Nail Art Brush or (my 17 - Midnight Sapphire nail polish already comes with an nail art thin brush) draw the lions arm, main body and tail. Its easier if you keep it all in one line and make sure you make the underbelly closer to the arm than the tail. And Fill in.
  3. Draw in both of the legs and fill in.
  4. Add in a couple of lines for fur on the arm, claws on the leg, and a couple of spikes on the heel of the backlog and on the tail.
  5. Pick up excess nail polish let it drip to the bottom of the brush to form a small circle and place it above of the arm. 
  6. While wet drag the brush from the centre to the outside to form the lions mane. And on the arm draw tiny semi circles for emphasis on the main.
  7. Now with a nail art brush or white add eyes, nose and mouth. And with a red draw a small diagonal above the main body.
  8. Add a dot to the centre of the diamond. Wait until everything is dry and top of with a top coat!

I really recommend you look up and refer back to picture so you can see why you need all those little touches, and so you get a better picture, of how it should look.

So let me know if you guys try it! Tag me or send me photos of your own Team England Nails to @lovefromangelic on both twitter and Instagram! And send me some suggestions for other team nails!
 

L.F.A. Xx

Wednesday, 18 June 2014

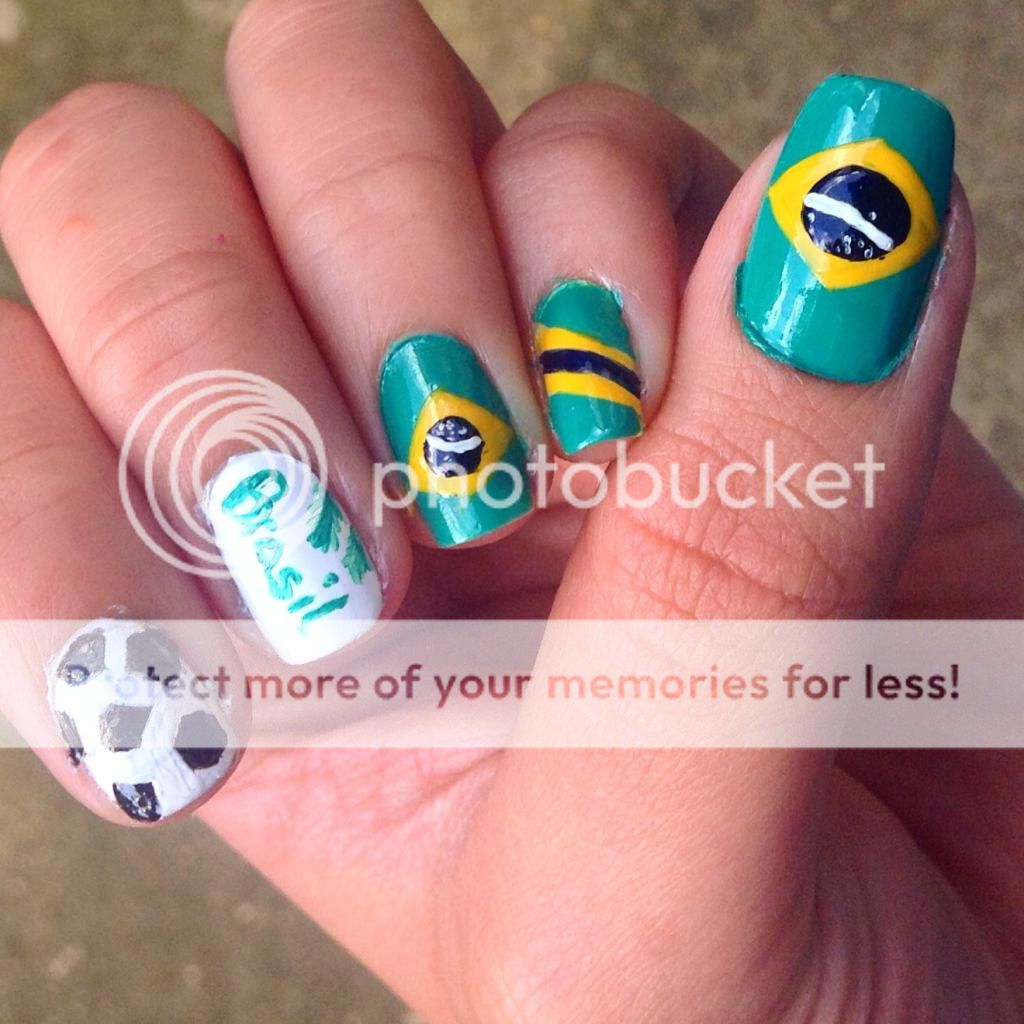
World Cup Nails - Team Brazil

Please Excuse the messy nails and bad quality photo!
 The World Cup isn't just for the Lads! Us girls can also love it (probably the only time I fully commit to watching football) and of course we can support all the while having a good manicure!
So if your Team Brazil why not try these beautiful nails! Now these do require some patience and a level of "nail art talent?" But there is a design for every level of artistry! So mix and match or try one of these out!
 
 
As you can see I chose an array of nail polishes and brushes to complete this design. They are: Nails Inc. - Queen Victoria Street, Essence - Black is Back, 17 (SEVENTEEN) - Midnight Sapphire and Mini Skirt, and last but not least a Latin American Brand (Aunt brought me them from Colombia) Masglo - Amarillo (Yellow). And the brushes I got from eBay!

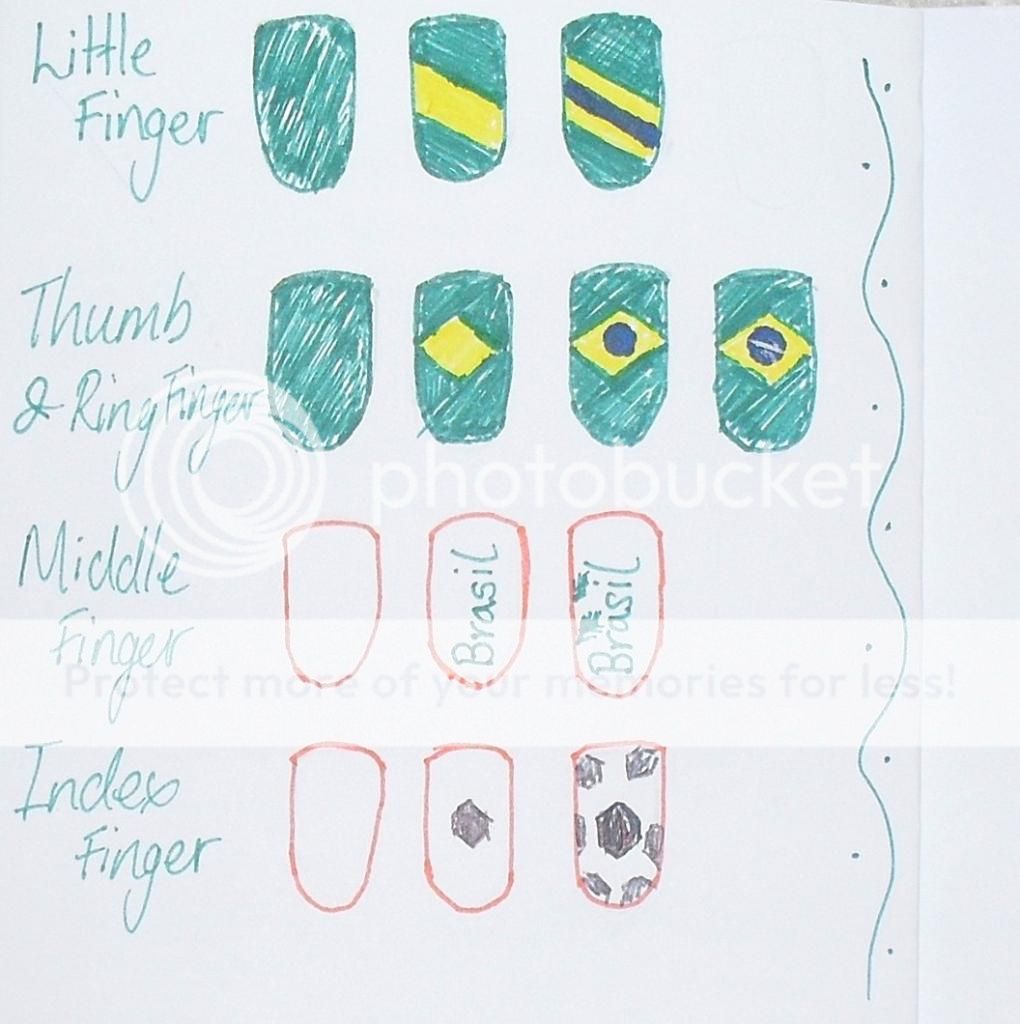
Now as you can see I have drawn a step by step guide to how you can do these yourselves. So girls why not follow these instruction:

Unfortunately I didn't take a picture of me doing them at the same time because quite frankly I wasn't sure how they were going to turn out and waste planning on doing a post but since they came out nicely I changed my mind so you guys could do it too! here are some tips so you can achieve this:

  • This will take time so have PATIENCE, be CALM and you will see that your hand becomes steadier.
  • Okay when you are going to do the circle for the Brazilian flag you can use a nail dotter if you have one (it would be easier but I don't have one) or don't clean your brush around the edges and you will see that the excess nail polish will begin to drip down to the end of a brush forming a ball like shape so all you need to do is place it on the centre of the 'Yellow Diamond'
  • You can leave the 'Brasil' on its own but I decided to just add a couple of leaves as rainforest inspiration.
  • Lastly for the football do a 'Pentagon Shape' and for each corner draw another pentagon with a little space between.

Guys if you try any of these please send me a photo! Tag me on Instagram or on Twitter with @lovefromangelic as I really want to see you guys try these!!
If you have any questions ask away and I will bet back to you asap!

 L.F.A. Xx

Saturday, 31 May 2014

BarryM Gelly Hi-Shine Nail Paint - Sugar Apple 21


This is another beautiful pastel nail polish that I know I will be using frequently this summer. I'm a little bit confused as to why it's called Sugar Apple if it's a light blue....but meh. (Also on the boots website the colour appears much.much darker than it actually is!) - Look further down to see how it looks on me!

The colour is a very flattering light baby blue colour and as it is part of the Gelly Hi-Shine range it has a very plastic looking/shiny finish to it which I absolutely love. It is also really nicely bright. (okay I really like it...)
You will need at least 2 coats for full colour payoff but luckily it doesn't take too long to dry.

Please excuse how red my hand looks...I was sunbathing but don't worry!  I USED SPF!
I would recommend this shade for those of you who love a good baby blue shade and want to try and incorporate a couple of inexpensive pastel colours for this Spring/Summer. I imagine that this will suit all skin tones 

You can get this at:

L.F.A. Xx

Wednesday, 21 May 2014

BarryM Gelly Hi-Shine Nail Paint - Rose Hip 20


Pastels are decently sweeping the shelves, replacing dark colours and welcoming the spring/summer. 
This shade in particular Rose Hip (Weirdly enough called Pink Lady on Superdrug website) has been currently liked by many bloggers and I can definitely see why. It is such a lovely shade of pink, honestly I can't even describe how flattering this colour actually is.

Now it's Gelly Hi-Shine aspect. I had never ever tried a Gelly/Gel Nail Polish Ever. Which is surprising as I love shiny nails (sorry guys I'm not a Matt nail fanatic...) Now they promise Hi-Shine and I must admit it actually does. I find it gives a very plastic looking finish, in a good way!!
 

You will just need 2 coats for full colour payoff, and since it does dry quite quickly it is easily doable.
I would absolutely recommend that you get this shade in particular as it's so flattering, so cheap and very very cute!

You can get this in:
Boots: Rose Hip 20 - £3.99
Superdrug: Pink Lady 20 - £3.99

P.S. Why not pair this nail polish with a cute pink Nail Art Deco Bow?
L.F.A. Xx

Sunday, 18 May 2014

eBay Bargains!

As a crazy bargain hunter I delved into the world of eBay to see if I could find some needed accessories! Bear in mind everything I bought was FREE DELIVERY! So YAY me!

Soooo sorry about the difference in quality!
First and foremost I got myself an Animal Art Printed iPod Hard Case for £2.45 of an artistic cute red cat which honestly is ridiculously cheap! and matching Red Headphones with a Mic for £2.99! There are loads of other animal options that are awesome! I will definitely be ordering more from them. And this headphone style is really comfortable for me!


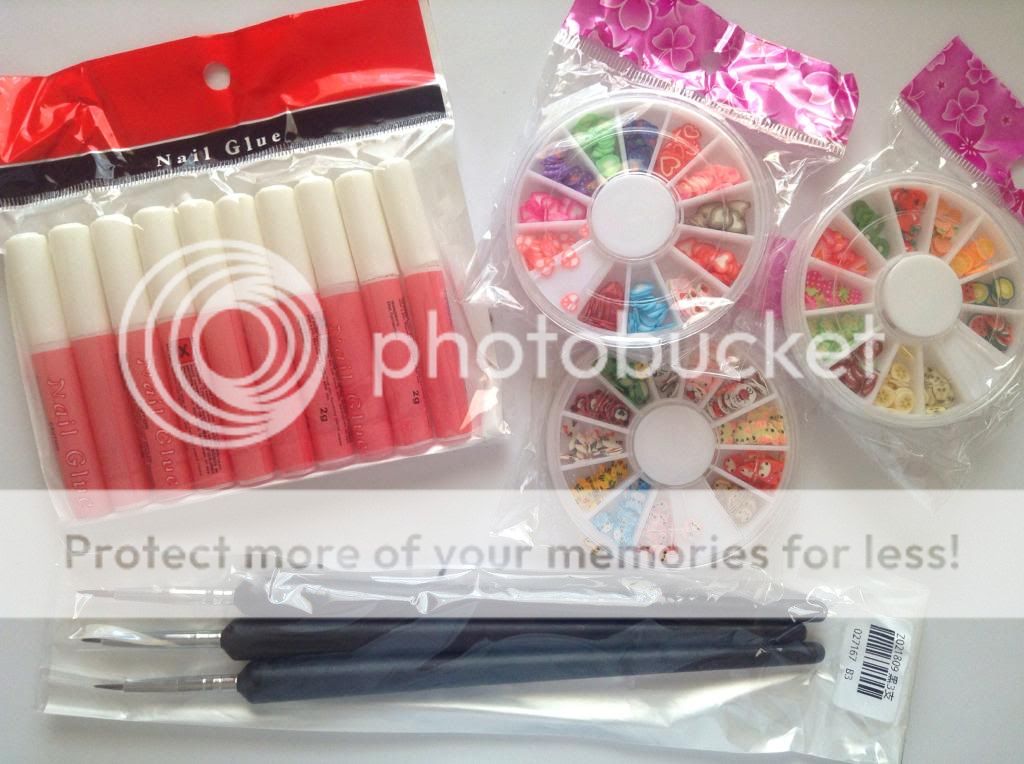
Now for the good stuff! If you know me well enough you may know that I am obsessed with Nail Decals; so that's nail stickers, gems, caviar, drawn on designs etc. and usually this doesn't come cheap unless you go to Primark or Poundland. So I figured why not get some stuff from eBay instead.

So firstly I ordered some Nail Glue (10x 2gram pieces) because I bought and have many nail art decals so instead of using a top coat to glue them I thought I'd try this, and as this only cost me 99p I really consider it a good price.

I also got a 3 Piece Tiny Acrylic Nail Brushes, so that I may draw my own nail designs. I got them through bidding for 21p (free delivery) I almost died! They are perfect except I wasn't expecting them to be so large/long but for £0.21 I can deal with it! Also look around and bid for them for a bargain.

Lastly I got three 3D Nail Art Wheels for 99p each. I got a Floral one, a Heart one and a Character one (so one with teddies, frogs and Micky Mouse!!!) which I'm most excited on using!

So what have you guys gotten recently from eBay?

L.F.A. Xx

Friday, 16 May 2014

BarryM Pastel Nail Paint Haul


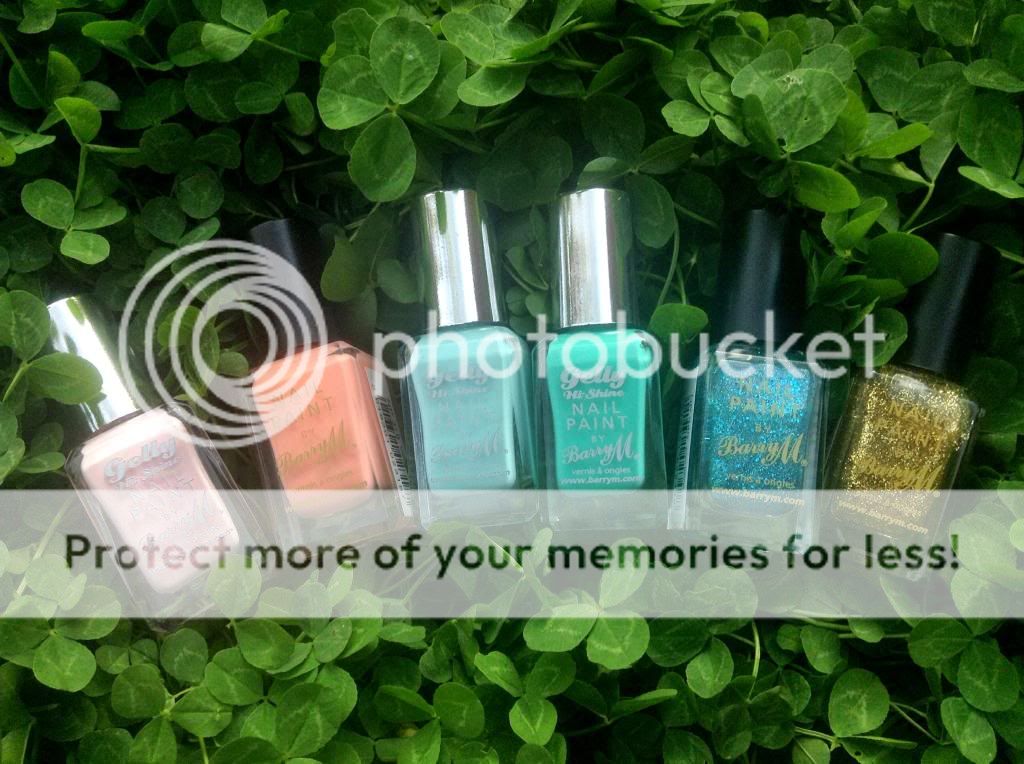
Now we are seeing sunnier days we can see that we are heading into Spring/Summer so after having used pretty much only Burgundy and Purple colours this winter I figured I should go out and buy a couple of pastel colours, and of course making the most of the 3 for 2 deal in Boots and Superdrug I bought these 6 lovely BarryM Nail Varnishes' 

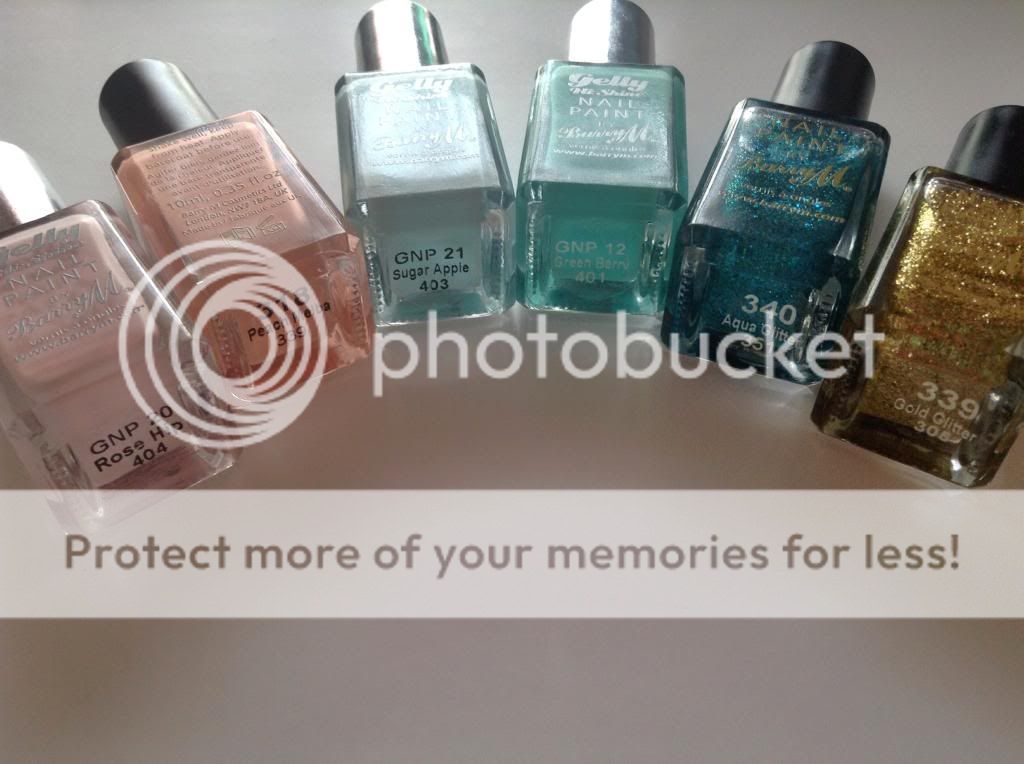
I got 3 from the Gelly Hi-Shine Range £3.99 each as believe it or not I have never tried a Gelly Nail polish before! Ever! ( yep I'm late to the party again) So I got Green Berry 12, Sugar Apple 21 and Rose Hip 20 (online called Pink Lady - not really sure why..) All of these colours are probably the nicest colour in the pastel range in my opinion.

From their normal range I got Peach Melba 318 for £2.99. And of course two glittery nail polishes Gold Glitter 339 and Aqua Glitter 340 also £2.99 each. 

I've seen a lot of fellow bloggers are really loving Rose Hip. Which is your favourite? Any other recommendations?

L.F.A. Xx

Monday, 21 April 2014

Revlon Fast Dry - 710 Cloudy


This is cute little polish reminds me of the Stereotypical British weather. Cloudy.


This nail polish was initially bought by my best friend from Fragrance Direct...but as she already had bought this previously it was passed down to me.!.!


This is a lovely cute Lillac/Grey-Blueish colour (I suck at descriptions)
And your going to need at least 2 coats for full colour.!  Also it's fast drying.!.!

So would you wear this colour?

L.F.A. Xx

Revlon Fast Dry- 730 Royal

Another Nail Polish that reminds me of Britain! The ROYAL family.
You can find this for as little as £1 on Fragrance Direct but I initially got this at the hospital where they were selling Nail Polishes to raise money.!
 
This is an awesome blue.! I had been looking for a navy/royal blue for a while but couldn't find one till this one.!
You will absolutely need to do 2-3 coats as it may be streaky.! And you MUST wear a base coat as it does stain.!
It also smells awful....but that's the price you pay if you want royal blue nails.

Are there any other nice blue nail polishes?

L.F.A. Xx

Half Polka Dot Nails


These Half Polka Dot nails look absolutely beautiful! It's just such a simplistic design but it can look so lovely. And I am not a fan of Polka Dots but this is actually really cute. It's also very versatile as you can use it with any color.! So there's one for everyone!


What you'll need is a toothpick (or a dotting tool if you have one. And two colors of your choice (preferably one dark one and a light one of the same color)

1. Paint your entire nail your choice of base color
2. Let that completely dry.!.!.

3. • Now with your choice of nail polish for the polka dots you can (like I did) add a dollop of it onto your hand or a piece of card?
    • Or you could use it straight from the brush but I feel like that may dry out my nail polishes....
4. And then with a toothpick (or dotting tool add it into the nail varnish and start adding the dots.

5. The size, distance between each one and height depends on your nail size and personal preference.
 
So have fun with it, try different colours and sizes and show me some of your attempts of these nails.!

L.F.A. Xx

Poundland Haul (Nail Stickers & Charms)


Since the last time I popped into Poundland I found such amazingly cheap nail products I thought I'd go back and see what else I could find.! All for £1 each.!.!.


These stickers are of Dragon Flies, Stars and Flowers both in Silver and Black with little rhinestones. All very cute.!.!.


These Floral Nail Stickers are a little larger. I presume for when your nails are significantly longer or I guess for a strong bold nail? They come in predominantly black with some pink, purple and white petals. Very cute but bold.


And finally these 3D Floral Nail Charms with a rhinestone at the center. I am super excites about these two.!.! Especially considering how much I loved the last Aurora Nail Bow Nail Charms.

So have you tried any of these yet?

L.F.A. Xx

Sunday, 13 April 2014

MaxFactor Glossfinity - 140 - Colbat Blue


 You may or may not remember me saying I wanted a nice blue nail polish. (Which I did end up getting but a girl can't ever have too many nail polishes right!?)

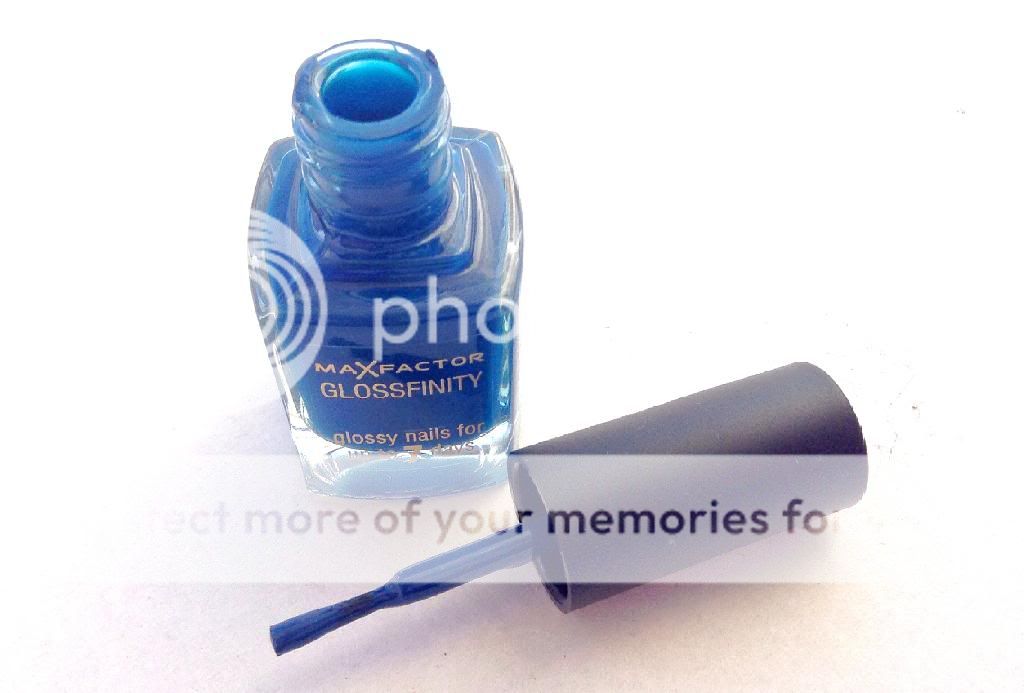
 Anyway I recently got the Max Factor Glossfinity - 104 - Colbat Blue, which is a lovely bright dark blue (if that makes sense?)
This particular colour came in the Max Factor Beauty Box which you got when you spent more than £15 (definitely worth it in my opinion as you get a lipgloss, nail polish and mascara.!.) All of which I will talk about eventually.

 
This retails for £5.99 (which for 11ml is alright considering it's payoff). You only need two coats for full coverage and full colour pay-off. It also dries quickly so great for me who always ends up doing my nails on public transport (sorry.!.!.)


Its name Glossfinity does it justice as it really does shine (when dry of course) and it really does last a long time. Not sure about 7 days as my bad nail habits are coming back but it definitely lasts more than 4 days.!.!.!.

I would absolutely recommend this to you and I plan on getting more.!.

L.F.A. Xx

Saturday, 19 October 2013

Nail Art Deco (Topshop)


 You may or may not know that I love nail art.!. I'm constantly following and looking for nail art blogs or instagram-ers?...so if you guys can recommend me some let me know.!
Anyway back to the point. I just wanted to show you guys these two little goodies I got from Topshop a while back. (I kinda forgot I hadn't posted it.....hehehehehe.!.)

First I got these Flower Nail Decals for £2.50.!. I think all of these are sooo cute and I can't wait for my nails to grow just that little bit longer to try them out.!. (Of course you can use these with short nails...but I just tend to complicate my life for no reason at all.)

You can get these online ---> here <---


And the other packet I got were these Creature/Animal Nail Art Decals also for £2.50. Initially I only got them for the Lady Birds as they just look adorable.!. But as I hadn't really used them and didn't really plan to. I decided to gift them to a younger cousin of mine who's really into Arts and Crafts, and girly stuff. 

I couldn't find these particular ones online but if you pop into a Topshop with a Make-up stand you should be able to find them. (I got them from the Oxford Street Store in London)

 Have you tried or got these?

L.F.A. Xx